Android rooting is the process of allowing users of Android phones, tablets, and other devices running the Android mobile operating system to get full control and authority within Android’s system. When you root an Android smartphone, it enables you to act as the administrator of the android phone. Rooting of Android provides you the facility to completely remove and replace your device’s operating system. Rooting not only increases your Battery life & Performance but also Provides you the option to upgrade your current Android version unofficially. There are many benefits of rooting your phone like:
Boost your Phone speed & Battery Life.
Remove Preinstalled crapware like System Apps.
Remove Bloatware, Apps like Facebook. Chrome Keeps sucking your Ram & battery by running in the background. So, Among the smartphone geek crowd, applications like these are referred to as “bloatware:” they do nothing but bloat the software by existing as unnecessary applications.
Tweak your phone like Increase Video streaming speed, Increase Wifi Speed, Increase SIM detecting Speed, Increase SD read/write speed.
Most Important & the Best part, Install Custom Kernel & Custom ROMS ( I will explain about it in the Installing Custom ROM section) Finally, Truly Own your Device; make it appear in the way you want.
Steps to Root Any Android Device In Single Click
Note:
No data loss process: Your Android phone data like contacts, pictures, video, etc., will not be affected.
Warranty Void: Your Android Device Warranty may get void after following the below tutorial. How to Unroot: To unroot your device, Open Kinguser on your device > Settings > Remove Root permission.
1. Method – Using Kingo ROOT
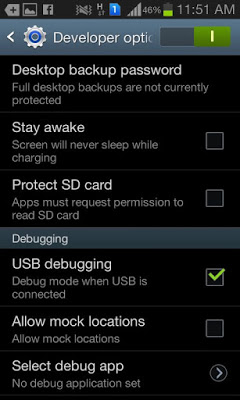
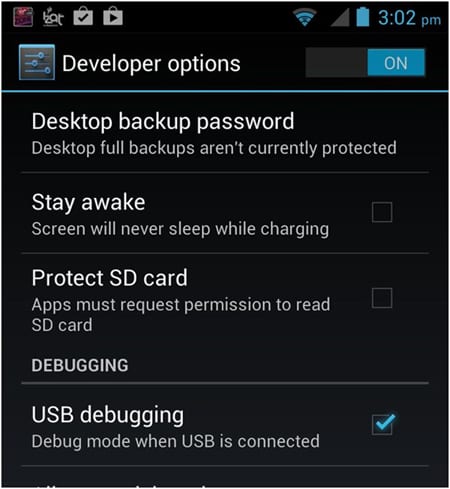
Kingo ROOT is – Click Root Designed to work on Windows Computer. It helps to root any Android Smartphones in a single click, which has a success rate of 80-90%. This is the best Android rooting software through PC available in the market. This is the only one-click root app with tons of developers working on it to bring improvements and increase the device limit in every update, which is released frequently. Step 1. Enable USB Debugging Mode on your Android smartphone. To enable USB debugging. Go to Settings > Developer Option > USB debugging. Developer Option is Hidden for Android 4.2.2 & Above. To show this option Go to Settings > About phone > Build Number ( Tap on it 7 times until it shows you are now a Developer.)
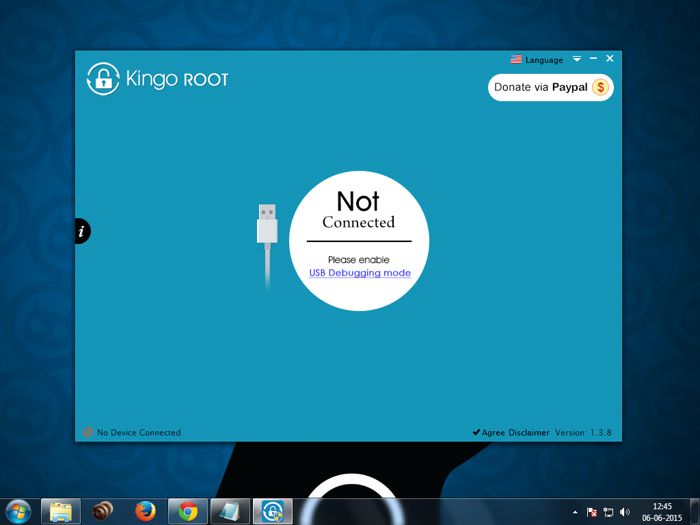
Step 2. Download Kingo Root Windows Application and install it normally on your Windows PC. Once you have Installed Kingo Root App on your Windows PC, you will see a window similar to this.
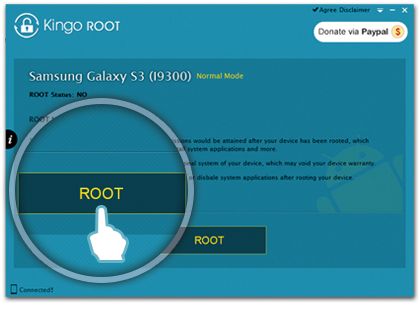
Step 3. Once your Smartphone is connected successfully to the Computer (Enabling USB Debugging), Kingo Root will automatically detect your device. Now, Click on the ‘Root’ button to begin the rooting process.
Step 4. Now Kingo Root will Automatically Root your phone and install SuperSU. Now your Android Device is rooted. To confirm, Check for an App named ‘SuperSU’ on your phone. Congratulations, you have successfully Rooted your Android Smartphone. I hope this guide helped in rooting your phone. Check if you are successfully rooted by downloading and installing the Root Checker App from Play Store. If Kingo Root was unable to detect or ROOT your device, you could use other One-click Root Apps mentioned below.
2. Method – Using VRoot
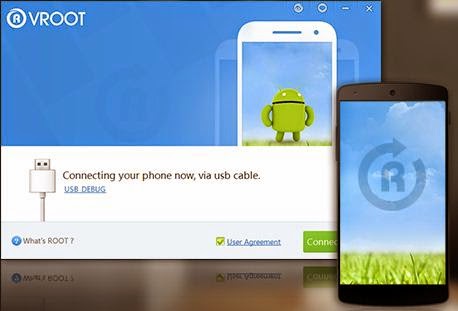
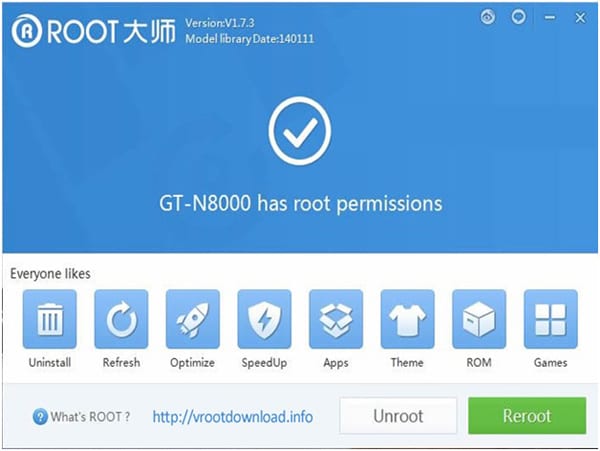
Vroom’s goal is to provide an excellent and simplest experience for all android users. The newest version of Vroot has been supported for more than 8000 kinds of Android devices. It is more effective, easier, and faster than you can imagine. Step 1. First of all, Download the VRoot App for Windows PC. Install it. Just click Next and Launch it. Step 2. Connect your Android device and make sure that USB Debugging mode is enabled from Settings > Developer Options.
Step 3. From VRoot on your PC, click Root. In my case, I have a rooted device, so I am getting the ‘Reboot’ option. On a non-rooted smartphone, the Reroot option will be replaced with ‘Root.’
Step 4. Wait for the result. If it’s a success, your device will reboot, and you can now disconnect your Android device from your PC.
Check if you are successfully rooted by downloading and installing the Root Checker App from Play Store.
3. Method – Using Root Genius
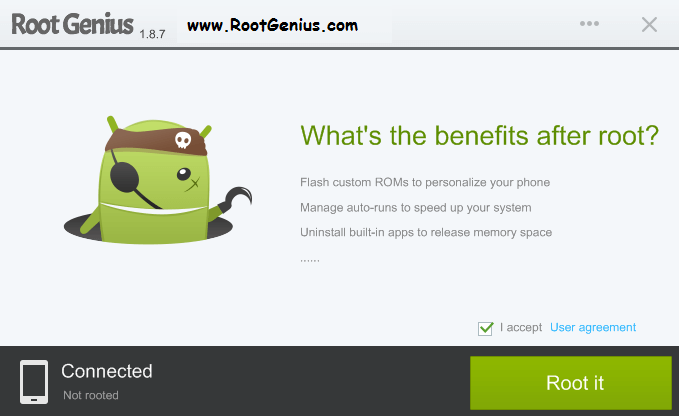
Root genius is the best & easy-to-use rooting software with a high success rate for Mediatek devices. Root Genius is a Windows Application. There are fewer chances of this rooting your phone properly. Step 1. Download and Install Root genius for Windows. Run Root genius as administrator and connect your Android device to your PC via USB cable. Wait for the drivers to load completely. Step 2. Enable USB Debugging mode from Settings > Developer options from your Android device.
Step 3. Just follow the instructions shown on the Root genius based on your Android version. Carefully read the notifications before continuing. Click Root it to begin the rooting process.
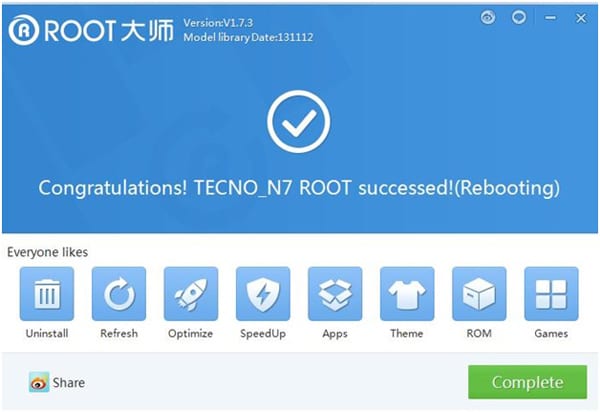
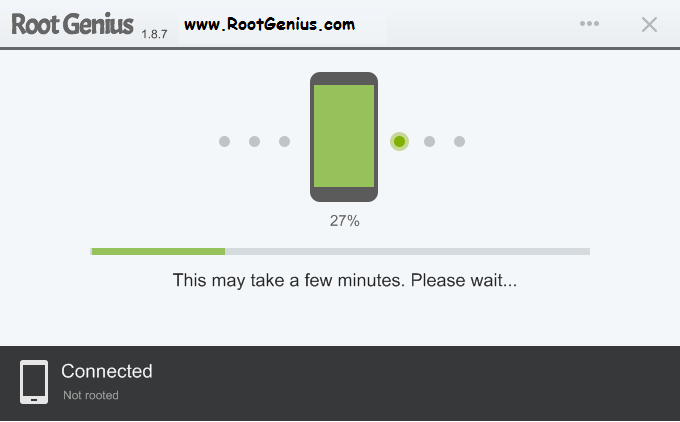
Step 4. It could take two up to 3 minutes for the rooting process to be completed. (Don’t unplug the USB cable).
When done, click Finish, and it will reboot your phone. Check if you are successfully rooted by downloading and installing the Root Checker app from Play Store.
4. Method – Using Unlock Root
Unlock Root roots and unlocks the boot-loader of various Android devices. They have their own way of rooting and unlocking. To use this method to root your phone, they have their guides provided on each android device. Just visit Unlock Root and follow their own guides for your device.
5. Method – Framaroot
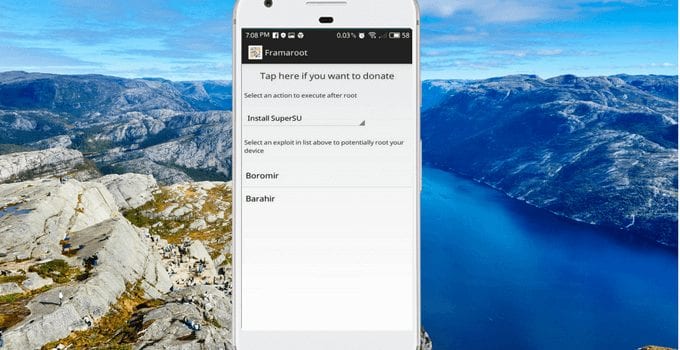
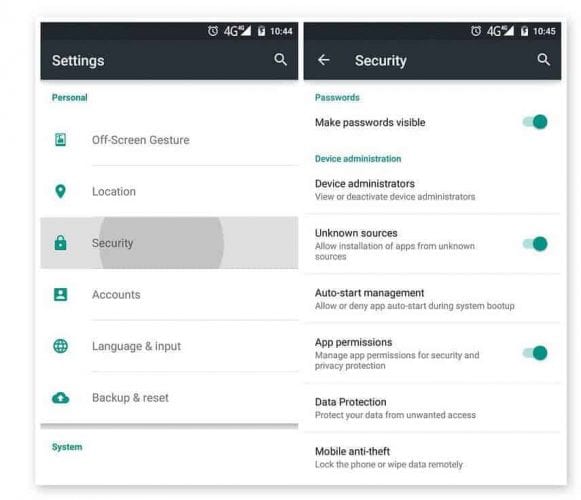
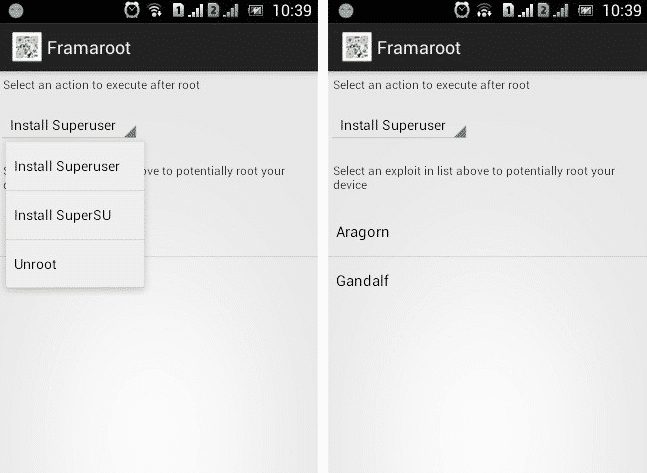
Well, Framaroot is one of the best and well known Android rooting app which you can use. The great thing about Framaroot Apk is that it allows users to root Android smartphones in just one-click. Apart from all of these, Framaroot also allows users to unroot Android smartphones. Step 1. First of all, download and install Framaroot Apk on your Android smartphone. Step 2. In the next step, head to Settings > Security > Unknown Sources. There you need to enable the option ‘Unknown Sources’
Step 3. Now install and open the app. You will see an interface like below. Here you need to tap on Exploit and select from ‘Super User’ or ‘SuperSU.’
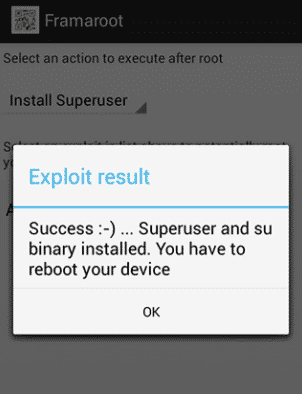
Step 4. It would be best to wait for a few seconds until you get a similar message on your screen.
That’s it; you are done! This message will confirm that everything went right while rooting your Android device. Now you can use root apps.
Other Apps To Root Android
Well, just like the above apps, there are plenty of other Android apps available on the internet that allows users to root their Android smartphone. Mostly, these apps don’t depend upon the computer to root your device. So, let’s know the apps to root Android smartphone.
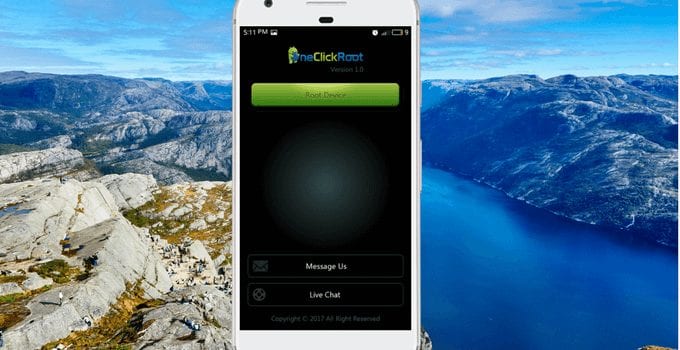
One-Click Root
Well, One Click Root is another interesting app that helps users to gain root access. As the app’s name says, One Click Root got the ability to root Android with a single click. Another best thing about One Click Root is its interface, which is pretty clean and well-organized.
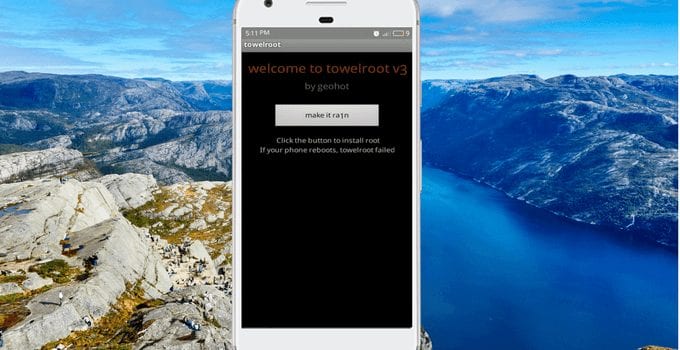
Towelroot
Well, if you are looking for a reliable app to root your Android, then Towelroot might be a great option for you. With Towelroot, you can gain superuser access. However, Samsung and HTC devices are not compatible with Towelroot. So, it’s another best Android rooting apps that you can use.
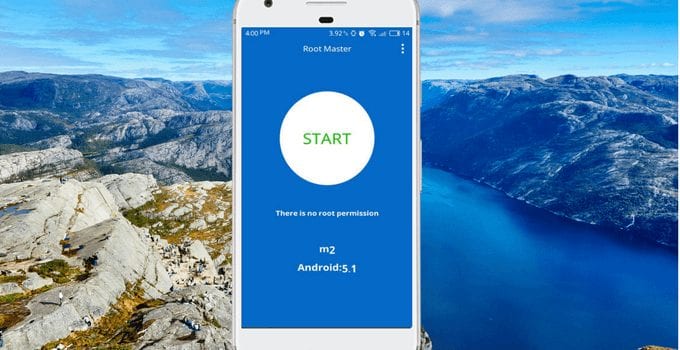
Root Master
Well, if you don’t have any technical knowledge on how to root, then Root Master might be the best option for you. The great thing about Root Master is that it’s free to use, and it doesn’t show any ads. Root Master allows users to root Android smartphones in just one tap.
dr.fone – Root
Well, dr. Fone – Root is another best Windows tool which can be used to root Android smartphone. The best thing about dr. Fone – Root arrives with a great interface, and it’s really very easy to use. Dr.fone – Root can root almost all Android devices manufactured by Samsung, Sony, Motorola, LG, Huawei, Acer, HTC, etc. It’s also compatible with a lower version of Android like Android 2.1 and later.
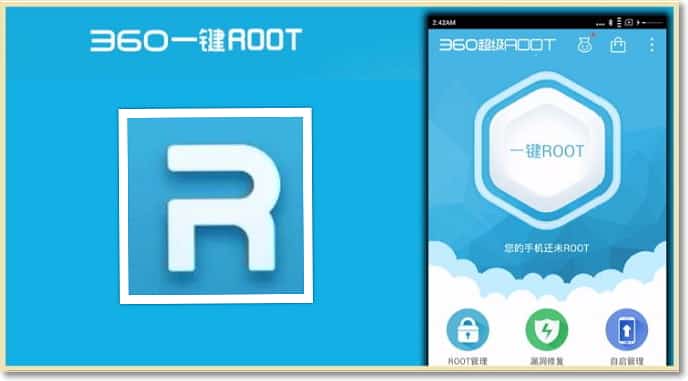
360 root
360 root is another most used software for rooting Android smartphone. The great thing about 360 root is that it can root Android smartphone running on Android v1.6 and higher. However, 360 root is a little bit outdated and won’t root the latest Android versions. The user interface of the software looks messy, and the success rate is also pretty low. So, we recommend you to use 360 roots only if the alternatives are not working. I hope this tutorial helped you in rooting your Android Smartphone. Though it has many advantages rooting an Android Smartphone without following proper instructions can be risky. But with these supplications,’s you can easily root your device and can have much out of it as it will speed up your Android’s performance, access hundreds of new and exciting features, and increase its battery life. And Rooting an Android device is totally safe and the best thing you and your device can have!