Selecting the Volume Mixer opens the panel that can be used to increase or decrease the volume of specific applications running in the background. With the volume mixer, you can manually adjust the sound of specific programs playing on your device. However, things have changed with Windows 11. If you have just switched to Windows 11, you might have noticed that the old Windows vertical Volume mixer is no longer available. Selecting the Volume Mixer option on the system tray opens the Sound settings page from where you can adjust the sound of apps, which is less accessible. Also read: How to View WiFi Password in Windows 11
2 Best Methods to Restore the Classic Volume Mixer in Windows 11
Due to this, many users want to get the old Volume Mixer back in their Windows 11 operating system. So, if you are also among those, you are reading the right guide. In this article, we will share a step-by-step guide on how to add a classic volume control icon to the System Tray. Let’s check out.
1) Using Classic Volume Control
We will use the Classic Volume Control tool to restore the classic volume mixer in Windows 11. The tool restores the functionality of the old volume mixer on the new Windows 11 operating system. Let’s check out.
First of all, visit this webpage and download the Classic Volume Control on your device.
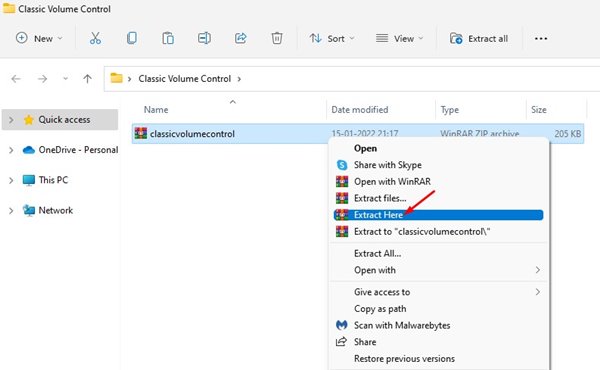
Once downloaded, right-click on the Classic Volume Control ZIP file and Extract it.
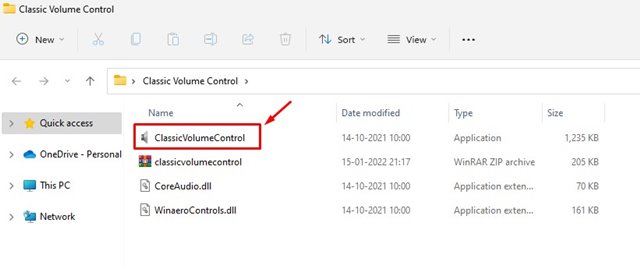
Now open the Extracted folder and double click on the ClassicVolumeControl executable file.
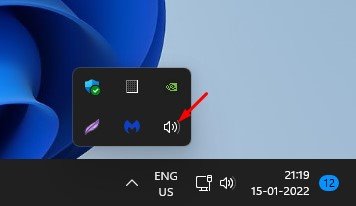
Once installed, you will notice a new Sound icon in the system tray.
Click on the icon, and it will open the old vertical sound control.
That’s it! You are done. This is how you can use the Classic Volume Control tool to get back the classic volume mixer on Windows 11.
2) Open Old Volume Mixer with Run Command
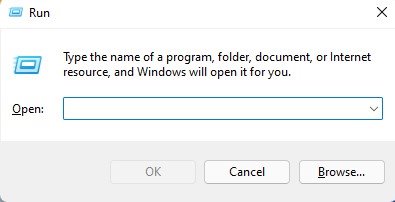
In this method, we will use the RUN dialog box to open the old Volume mixer. Here’s what you need to do.
First of all, press the Windows Key + R button on your keyboard. This will open the RUN dialog box.
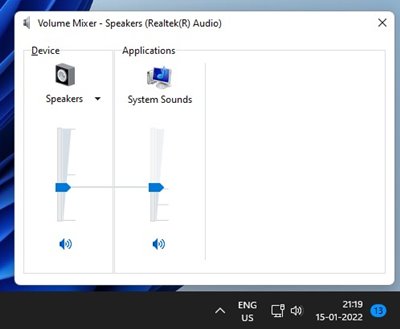
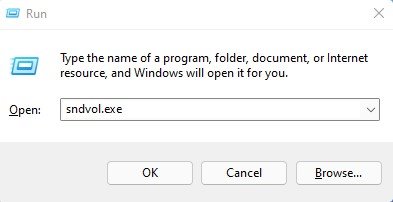
On the RUN dialog box, you need to type in sndvol.exe and press the Enter button.
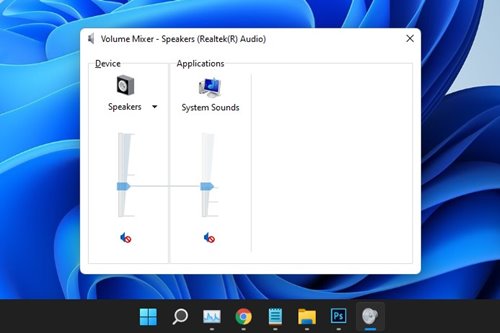
This will open the classic Volume Mixer on Windows 11.
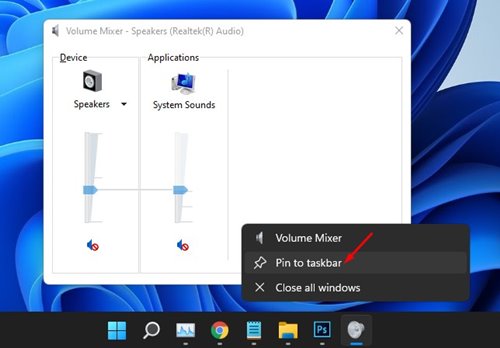
You need to right-click on the Volume Mixer icon on the Taskbar and select the Pin to Taskbar option.
That’s it! You are done. This is how you can use the RUN dialog box to bring back the old volume mixer in Windows 11. These are the best methods to restore the classic volume mixer in Windows 11. I hope this article helped you! Please share it with your friends also. If you have any doubts related to this, let us know in the comment box below.