Generally, a simple restart could fix most system-related problems, including lags & freezes. However, what if I tell you that you could fix specific problems on your Windows PC without restarting it? When you feel tempted to restart your PC, instead of restarting your entire PC from the power menu, you can just restart the Windows Explorer process. For those who don’t know, Windows Explorer is basically a program manager process that provides a graphical interface you use to interact with most of the Windows. It is a process that is responsible for starting and displaying most of the user interface in Windows, such as the taskbar, desktop, Action Center, Start Menu, and File Explorer. So, if your taskbar, desktop, Start Menu, or even the File explorer is frozen, you can just restart the Windows Explorer or Explorer.exe process.
2 Methods to Restart Windows’ Explorer.exe to Fix Frozen Desktop
Hence, in this article, we will share the 2 best ways to Restart the Windows Explorer or Explorer.exe process in Windows 11. Let’s check out. Please note that certain apps require a restart after the installation, and restarting the explorer.exe, in that case, won’t work. Also, restarting the explorer.exe works only when the UI elements of your operating system were crashed or frozen.
1) Restart Explorer.exe from the Task Manager
In this method, we will use the Task Manager utility to restart the explorer.exe process. Here are some of the simple steps that you need to follow.
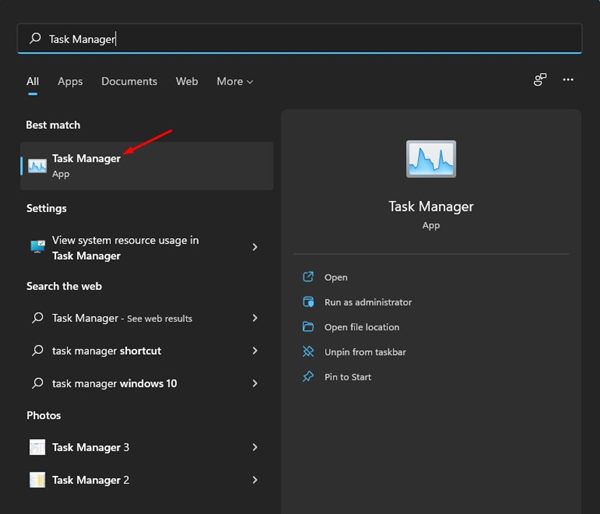
First of all, click on the Windows 11 search and type in Task Manager. Next, open the Task Manager from the list.
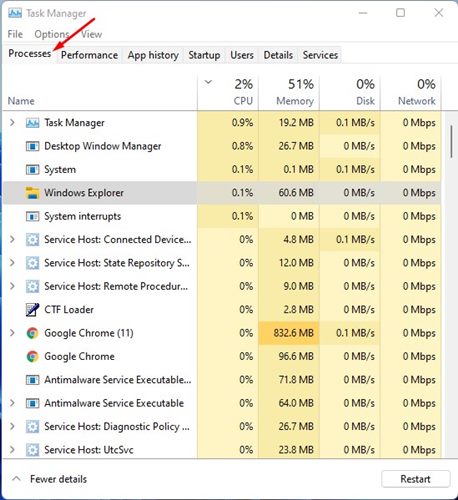
On the Task Manager, switch the Processes tab as shown in the screenshot below.
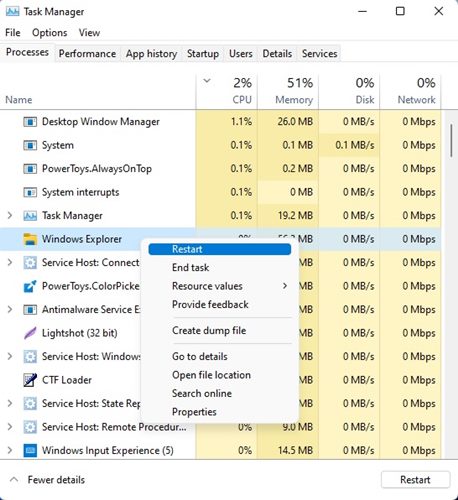
Now find the Windows Explorer, right-click on it and select the Restart option.
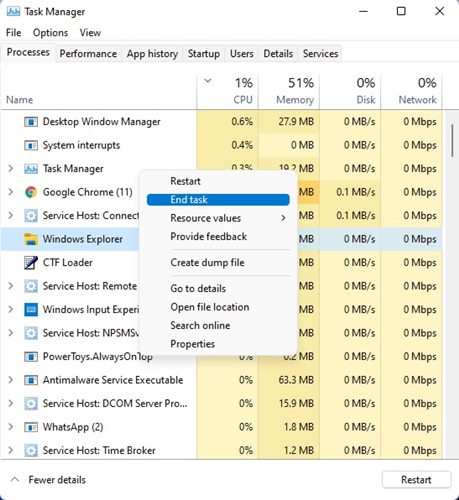
Alternatively, you can even end the Explorer.exe or Windows Explorer process. For that, right-click on Windows Explorer and select End Task.
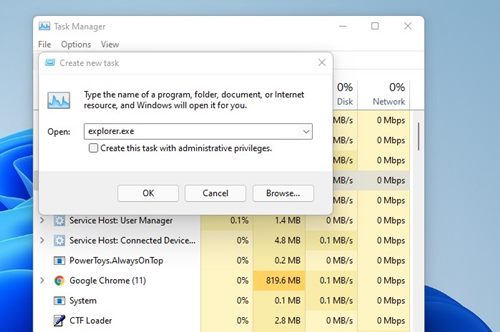
To rerun the Windows Explorer, click on the File menu and select the Run new task option. Then, on the Create new task window, enter explorer.exe and click on the Ok button.
That’s it! You are done. This is how you can restart the Windows Explorer process in Windows 11 operating system.
2) Restart Explorer.exe with a Batch file in Windows 11
Well, this method works on every version of the Windows operating system. If you don’t want to rely on the Task Manager all the time to restart the Explorer.exe process, you can instead create a batch file for it. After creating a Batch file, just double click on the batch file whenever you feel like restarting the Windows Explorer process. Here’s how to create a batch file to restart Windows Explorer.
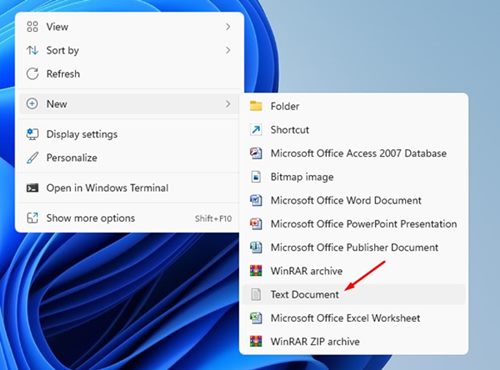
First of all, right-click anywhere on a blank screen and select New > Text Document.
On the Notepad, copy and paste the following text: taskkill /f /IM explorer.exe start explorer.exe exit
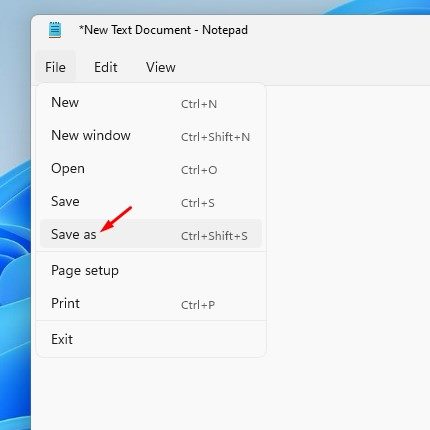
Once done, click on the File and select the Save as an option.
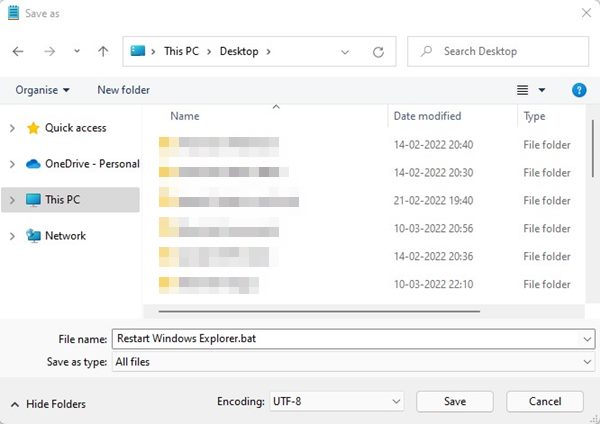
In the Save Window, choose your location, and then under the Save as type, select All Files. Next, name the file whatever you want, but make sure the .bat extension follows it. Finally, click on the Save button to save the batch file.
Usually, the Windows Explorer process can work without a glitch for a long time, but sometimes one or more of its graphical elements could break, leading to Windows 11 freeze or taskbar not responding. In such a case, you can restart the explorer.exe process to resolve the problem. I hope this article helped you! Please share it with your friends also.
