Windows 11 even has a feature that automatically locks the PC once it goes to sleep mode. The feature is called Login after sleep, and if you enable this feature, you will see a login screen whenever your PC wakes up from a sleep mode. The Login after sleep is a great security feature, mainly if your family members use your PC. This makes sure that the user who owns the PC is the one trying to access it. However, if you only use the PC, the same security feature can become irritating. So, if you feel there’s no need for the Login after sleep feature on your PC, you can disable it from the Settings app easily. Hence, in this article, we will share a step-by-step guide on quickly disabling the Login after sleep security feature in Windows 11. Let’s get started.
Steps to Disable Login After Sleep in Windows 11
The good thing about this tutorial is you don’t need to edit the registry file or make changes to the Local Group Policy to disable this security feature. You need to make a single change to the Sign-in option to disable the Login after sleep feature. Here’s what you need to do.
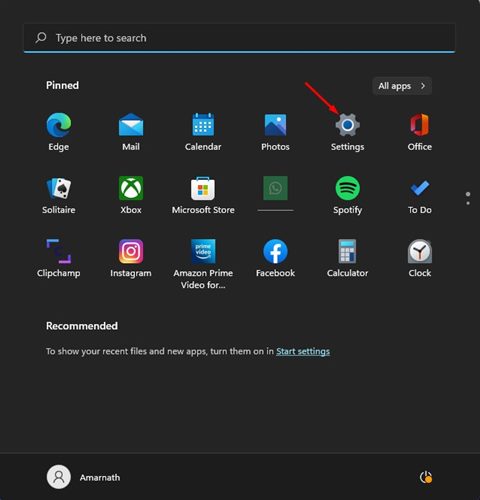
First of all, click on the Windows 11 Start button and select Settings.
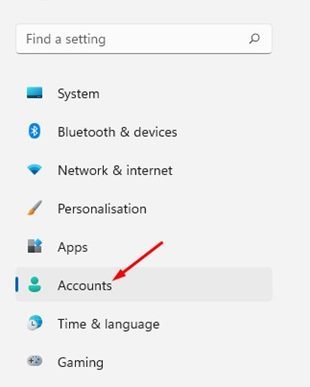
On the Settings app, click on the Accounts option located on the left pane.
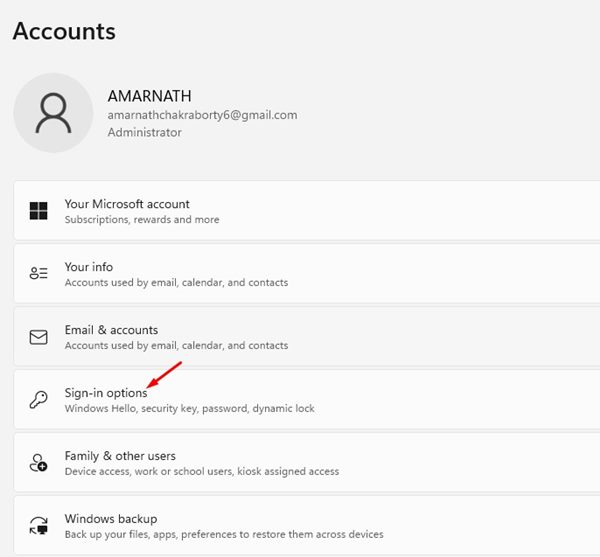
On the right pane, scroll down and click on the Sign-in options.
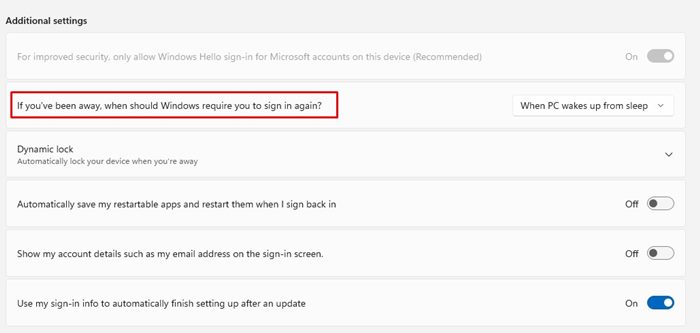
On the Sign-in Options screen, expand the Additional Settings section.
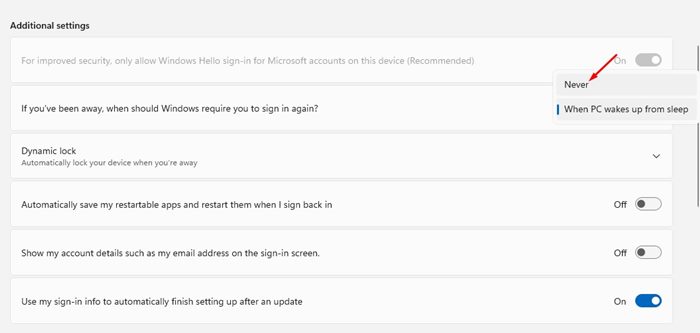
Next, find the option ‘If you’ve been away, when should Windows require you to sign in again?’
To disable the Login after sleep feature, Never select the drop-down menu for ‘If you’ve been away when should..’
That’s it! You are done. This is how you can disable the Login after sleep feature on Windows 11. So, that’s all about how to easily disable the Login after sleep feature in Windows 11. Although disabling the feature is easy, you shouldn’t disable it if your PC is used by anyone else in your family. If you wish to enable this feature again, you need to revert your changes.
