PowerToys has a tool known as ‘PowerRename’ that allows users to rename multiple files at once. To use the new tool, one needs to install the PowerToys on their Windows 10 computer. For that, follow our guide How to Download & Install PowerToys in Windows 10.
Steps to Batch Rename Files in Windows 10 with PowerToys
Once installed, users need to follow some of the simple steps given below. So, let’s check out how to bulk rename your files on Windows 10 with PowerToys. Step 1. First of all, right-click on the ‘PowerToys’ application from the system tray.
Step 2. From the right-click menu, select ‘Settings.’
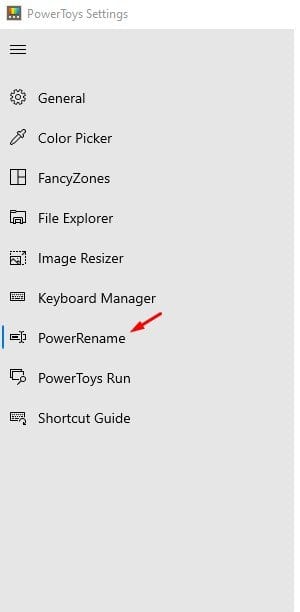
Step 3. From the left pane, click on the ‘PowerRename’ option.
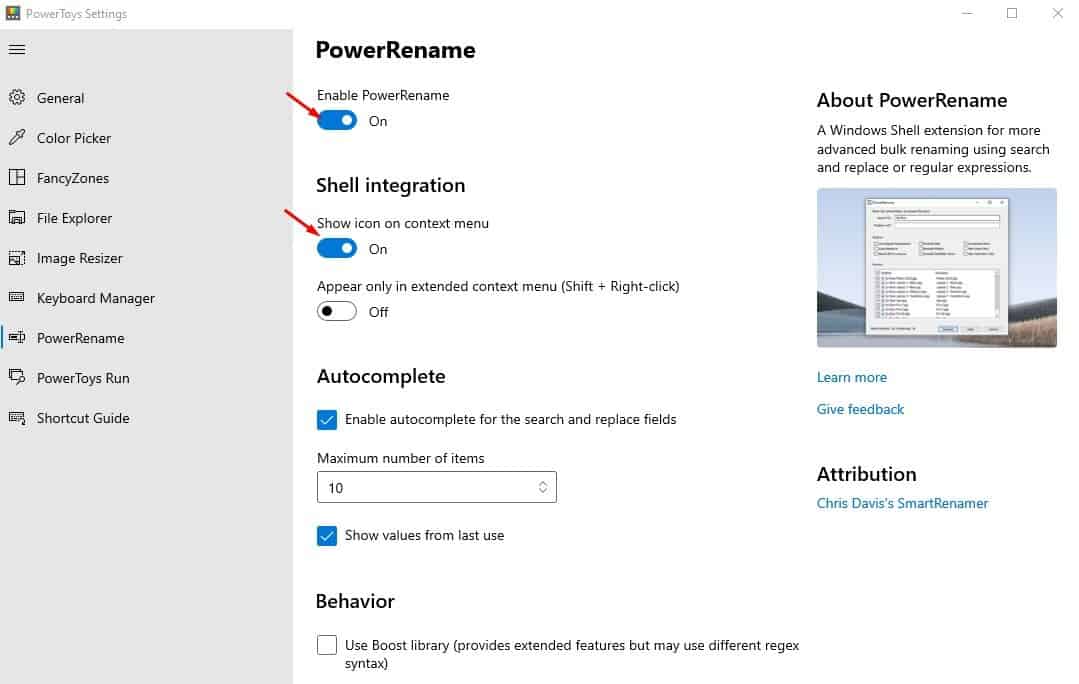
Step 4. On the right pane, Enable the option ‘Enable PowerRename’ and ‘Show icon on context menu’ option.
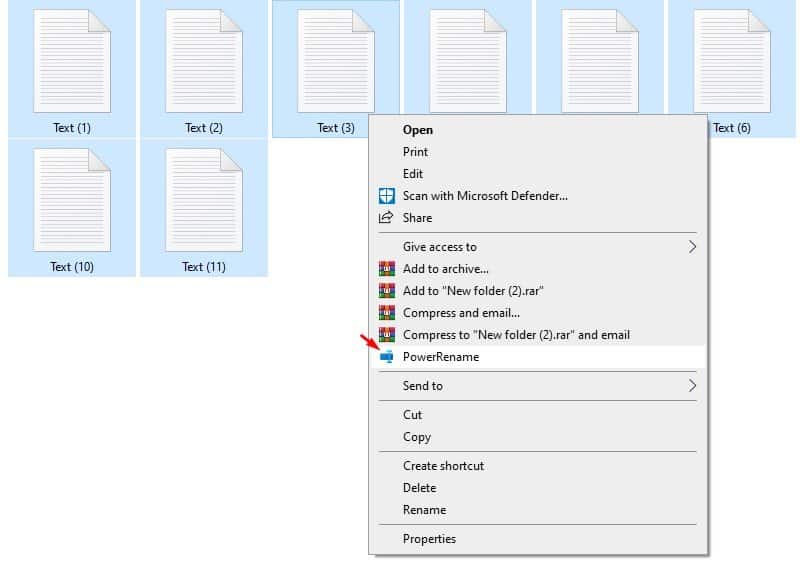
Step 5. Now open the File Explorer and right-click multiple files or folders. From the right-click menu, select ‘PowerRename.’
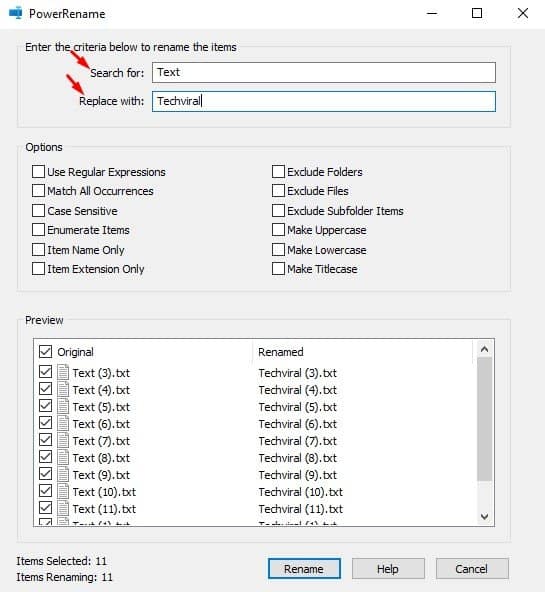
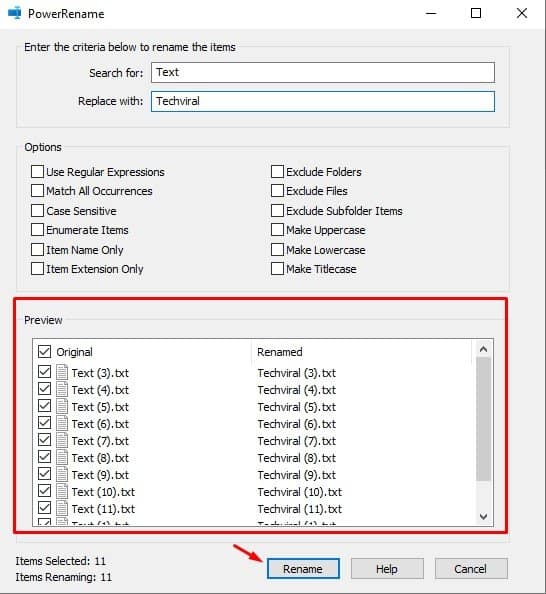
Step 6. Now you will see the PowerRename Window. At the top of the Window, type what you want to search for, and on the next, type what you want to replace it with.
Step 7. Once done, PowerRename will show you a preview of the results. If you are happy with the result, click on the ‘Rename’ button.
That’s it! You are done. This is how you can bulk rename your files and folders on Windows 10 with PowerToys. Note: If you cannot find the ‘PowerRename’ tool, make sure to update the PowerToys. To update PowerToys, click on ‘General’ and then click on the ‘Check for Updates’. So, this article is all about how to bulk-rename your files on Windows 10 with PowerToys. I hope this article helped you! Please share it with your friends also. If you have any doubts related to this, let us know in the comment box below.

